Dry Rub On Ribs – Best Application & Cooking Directions
Imagine a dry rub on ribs so delicious they burst with an incredible depth of flavor like you’ve never experienced before. Sinking your teeth into pork ribs so tender, the meat just effortlessly falls off the bone. That’s the magic a well-formulated dry rub, and masterful cooking process will produce. Forget messy marinades; dry rubs offer a simpler, more versatile path to barbecue perfection. They’re easy to use and can transform ordinary ribs, whether they be St. Louis spareribs, baby back ribs, whole rack “untrimmed” ribs, or even country style ribs into a culinary masterpiece. So, without further ado let’s make it happen cap’n!
Jump To Sections…
Step-By-Step: Prepping Ribs & Applying Rub For Maximum Impact
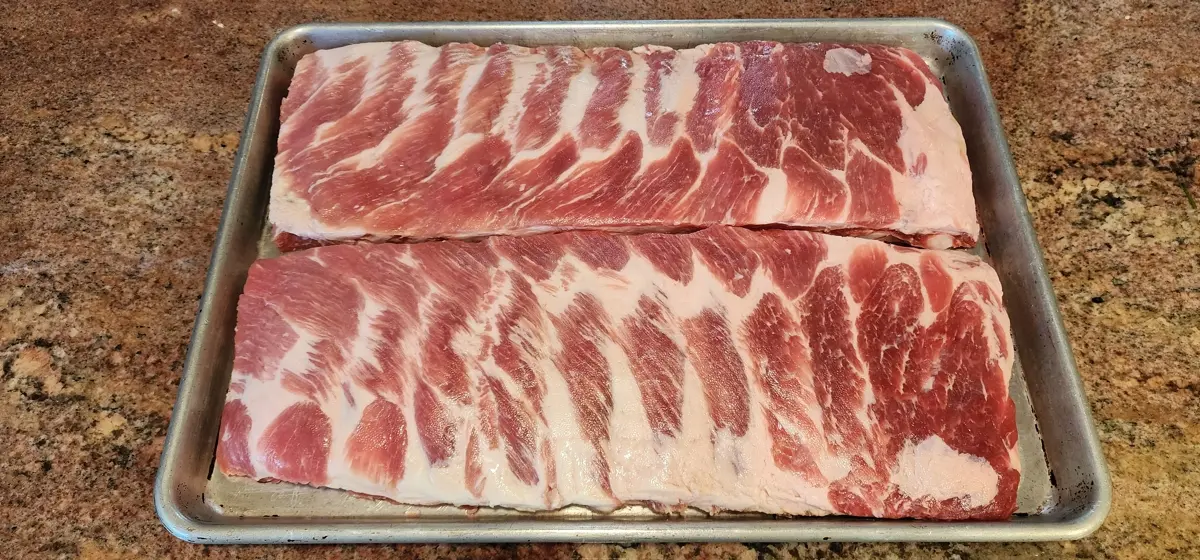
Preparing the Ribs
Step 1: Make sure your meat is fully thawed. Trim your ribs or leave them fully intact. Some like a St. Louis cut, and others don’t.
Membrane on or off? It will be up to you to remove the membrane, or leave it on. Leaving the membrane on seems to produce a juicier result, and it will just crisp up and cook off enough to where you can’t even tell it hadn’t been removed. Or you can always just score it with a sharp knife if you don’t want to take it all the way off.
Using A Binder
Step 2: Proceed to apply whatever binder you like, or not. I use a very light application of yellow mustard. Others use Worcestershire sauce, olive oil, hot sauce, mayo, etc. Totally up to you.
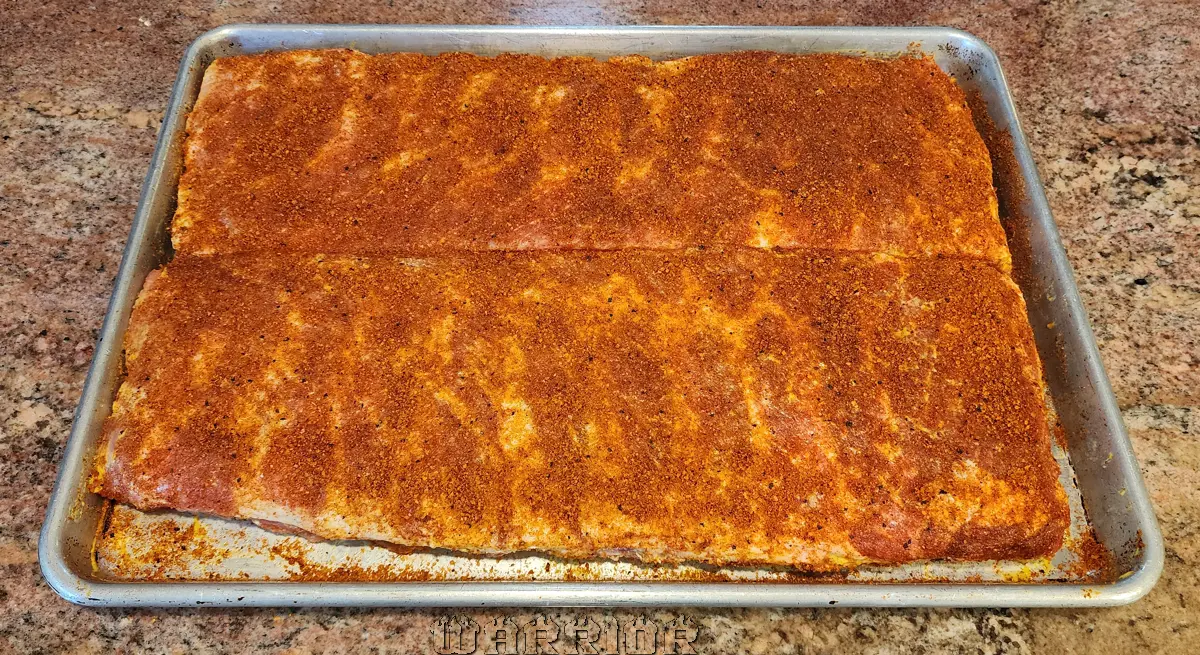
Rub Application Technique
-Transfer your rub from the package I sent you into a shaker bottle that you like. Any type of container that previously held any type of dry ingredient works great. Parmesan cheese bottles are my favorite! I like using them, because they have bigger holes on the lid that allow for better, easier, more uniform application.-
Step 3: Once you’ve gotten the binder on proceed to shake the dry rub on ribs. I normally start with the underside where the membrane is or was. If membrane on, then it’s not necessary to apply rub to it really, as it won’t penetrate there unless scored. Make sure to cover all the meat and bone sides. Just pat the rub in lightly, there’s no need to use a rubbing motion. You’ll end up taking it off if you rub.
Flavor Penetration
Step 4: After rubbing just let them hang out for about an hour on the countertop at room temp before you get ready to put them on the smoker/grill. They’re gonna sweat a little and that’s normal (they’ll start to look wet and will glisten). The beauty behind using a dry rub on ribs is its ability to impart great flavor easier and faster. Since the meat surrounding pork rib bones is thinner versus a brisket for example, it’s easier for the flavor of a dry rub to penetrate quicker. Now would be a great time to get your fire going the right way while the rub flavors infuse.
Get Your Fire Going While The Dry Rub Takes Hold
You can use any type of smoking equipment to cook your ribs this way. From offset smokers to direct heat cookers and pellet fed systems, they all require some type of fuel source for a seamless cook.

Fuel Source For The Best Outdoor BBQ Grilling Experience
When using the smoking method a good recommendation is to use a high quality lump charcoal. Lump burns cleaner and longer, and there are a variety for you to choose from. I prefer Jealous Devil. I find that to be a really good option for barrel smokers and other types of direct heat cookers like Kamado’s & Big Green Egg’s, as well as box store grills. For pellet grills it’s all a matter of choosing the type of pellets you want to cook your ribs with.
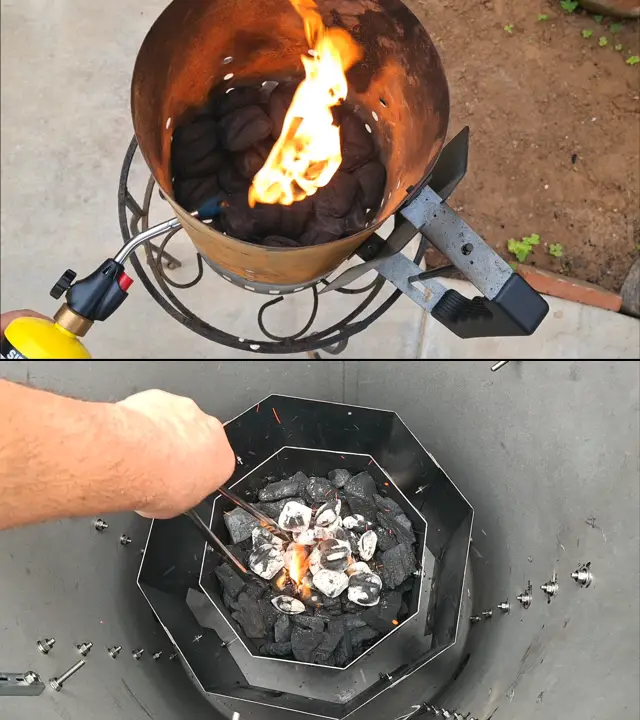
How To Light Your Fire
I’m a smoker grill manufacturer, so the method I use to light fires in my drum smokers involves 2 steps. I basically use a charcoal chimney to light off a small amount of charcoal briquettes first. Usually anywhere from 11 to 17 if I’m counting. Once ashed over (like salt & pepper) they will be dumped on top of lump waiting to be lit inside the charcoal basket. No need to turn them completely white, because you’ll just be wasting fuel that way. This method is just meant to get the lump going better & faster for a more successful, error free cook. The way I get them lit is by placing a wax cube on top of them inside the chimney, then using a small torch to light the cube. It takes around 10 to 15 minutes for them to be ready. Once ready I just take the chimney and dump them onto the lump in the coal basket inside my drum. Open up all the air vents and let the lit coals catch the lump on fire. Takes about another 15 minutes to get a good solid fire going, that you can count on.
I do the same thing when using a simple Weber grill for faster grilling.

Adding The Wood Of Your Choice
Choosing the smoking wood for adding that extra seasoning ingredient is relatively easy. And, that’s all smoking wood was meant to be – an essential ingredient added to your overall flavor profile. It wasn’t meant to overwhelm your food. So, what wood works best for pork, you ask? It all depends on your palate. However, some good choices would be oak, cherry, hickory, pecan, mesquite, applewood, and maple. You can do combos like cherry & hickory for example. It all depends on what you like, and you only need a couple small to medium sized chunks. Anything above that when using more compact and direct heat cookers would have the potential to over-smoke your meat. Just throw a couple of chunks on the coals right before you get your ribs on. That way the right amount of smoke will penetrate in the beginning, which is the best time for that to happen.
*Pro-Tip: Throw a couple sweet onion chunks on the coals with your wood for a fantastic flavor additive, and an inviting fragrance to your neighborhood!
The Cooking Phase: Directions & Using Different Methods
Pork ribs are versatile. You can cook them using various methods, each lending their hand to a unique flavor profile. The way you cook them at the temperature you set will be totally up to you. Low and slow smoking, live fire grilling, and oven baking are the most popular methods. For this “how-to” I’ll be going with the smoking method considered to be hot and fast.
Smoking & Glazing for Unmatched Flavor
Smoking is the gold standard for dry rub ribs. There are different styles of smoking using different equipment and temperature settings. The “low and slow” method is the most well-known operating anywhere between the 225°F and 250°F range. Some like a hotter and faster cook, which is what I like. 300°F is the range I prefer to smoke my ribs. However, some like to operate around 275°F. Cooking at these higher temperatures have come to be known as the “hot & fast” method. When using a drum smoker they just produce an excellent result for that temperature. The 3-2-1 method is a thing of the past that just takes too long, and is completely unnecessary. Who wants overcooked ribs when you can get a better outcome in a shorter period of time?
Make sure to Spritz them along the way. When I’m smoking ribs I normally spritz after the first half hour or hour with the hot & fast 300°F method I use. I really never spritz more than 3 times on most rib cooks. Obviously the hotter you go may require you to keep them more moist, which will require more spritzing. But you don’t want to over-wet them, because then the rub won’t set right, and you might end up washing some of it away. I normally use apple cider vinegar by itself as a spritz. For some reason the vinegar seems to help tenderize the meat better than apple juice, water or anything else. But if you like you can use equal parts vinegar with other liquids like apple juice & water as a spritz.
You can also cook/smoke them all the way through without a wrap at these hotter temps of 275°-300°F. You’ll just need to spritz a little more often. This is where a baste or mop can come in handy!
*Pro Tip: Lightly sprinkle a little more dry rub on ribs closer to the end before you wrap. This will give them an extra flavor infusion.

When To Wrap
They’re usually ready to be wrapped in foil somewhere between the 2-2.5 hour mark when cooking at a 300°F temp. If you’re doing a lot of racks all at once for a party using the hanging method, then they might take a little longer to finish. I don’t generally go by internal temperature. Instead I go by time and feel using the bend test. You just pick them up and just let them hang from the middle to see how they bend. You can judge doneness this way by feeling how tight they are. But, if you like to go by temp, then once they’ve reached an internal temperature of about 160°-165° pull them off and get them ready to wrap. I like to use foil.
From there you can add whatever other delicious extra ingredients you like to the wrap such as:
-butter
-brown sugar
-honey
-apple juice
-more dry rub
-special secret seasoning you may know about
-peach nectar
-agave
-maple syrup
-BBQ sauce/sauces
-hot sauce, etc.
Once you get them back on the fire it takes about another hour or so. Again, I personally go by time and feel. But, that comes with experience, so if going by temperature, a good internal doneness temp for pork ribs can be anywhere between 195°F and 204°F. It all depends on whether you like them fall off the bone or competition style. Comp style ribs have a nice tug when you bite through, whereas fall of the bone is more borderline mushy.

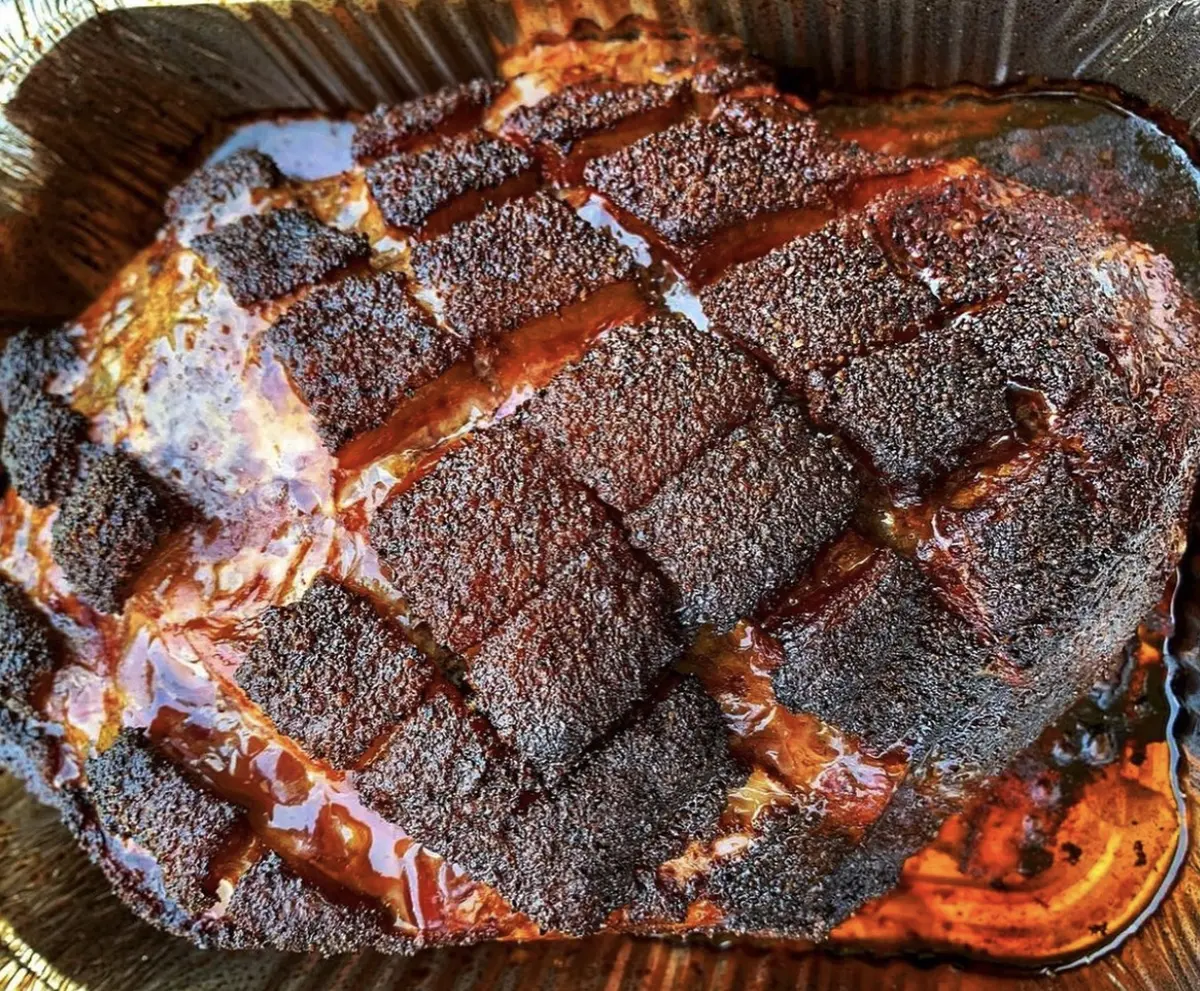
Glazing Ribs
If you are a fan of glazed ribs, then you’ll want to put them back on after they’re done, unwrapped for about 15 more minutes. All you need is to lay on some barbecue sauce on both sides or just one. You just want to let the barbecue sauce tack up a little. I normally just serve the sauce on the side. That way you can taste the magnificence of your flavor profile! But, glazed is excellent too. Some people like what’s known as a “muddy rib”. All you do is just sprinkle on a little more dry rub on ribs to meld with the sauce. That’s it! It’s all about building layers of flavor.
Two Alternative Cooking Options
Live Fire Grilling For A Fast & Easy Option
Grilling is a fantastic way to cook spareribs and baby back’s. Also known as turning and burning or “turn n burn” in some areas of the country, they’re usually done at higher temperatures unlike the smoking method that generally takes longer. Turning and burning can be an open flame situation with temperatures in the 400°F range. You just have to turn them more often to avoid excessive charring, or have a space on your grill offset to the direct heat and flame to be able to move them to periodically. You can be done with ribs in as little as an hour or so using this method. You can use a handheld meat thermometer to probe for doneness, but most of the time you just go by sight and feel using the bend test.
Oven-Baking for Convenience
Don’t have a smoker? The oven works great too, especially for country style ribs! Put the ribs inside of your favorite baking dish or roasting pan in a single layer fashion. Then proceed to sprinkle dry rub on ribs to your liking. Add a splash of liquid (apple juice or broth), then cover the ribs in your dish tightly using foil. This helps maintain moisture. Bake at a low temperature (around 300°F) for a couple hours until tender. Then, unwrap them, carefully, because the release of steam will be hot. At this point you can drain the liquid. Then, brush them with a delicious barbecue sauce and bake for another hour at 275°F. Or you could broil for a few minutes to develop a bark instead.
Barbecued Chicken: Seasoning, Temperature, And Time
Since our rub also works great on chicken we thought we’d add some pointers about poultry as well. Barbecuing chicken with our dry rub is going to be a similar process. Plus, could very well lead to some of the best tasting BBQ chicken you’ve ever had!

Applying The Seasoning
The best way to apply seasoning to chicken is to get it underneath the skin, so that the actual meat can take on flavor. You can use a binder here too if you like. I use olive oil. Just gently peel up the skin in the places you can without tearing it off completely, and proceed to apply rub directly to the meat. You don’t have to go super heavy, just enough to give it a light to medium light coat otherwise you might give it too much overwhelming flavor. Put some on the skin too, lightly. Then just let it hang out for the time it takes you to get your fire or oven ready.
Cooking Temperature For The Grill
I think chicken is best cooked quickly at a higher temperature, preferably around the 400°F range. Others like 350°-375°F. Some like low and slow around 250°F. It all depends on your preference. For these directions we’ll use 400°F (200°C). If you have the kind of cooking equipment that will allow you to fill up an entire grate like a barrel smoker, great! With outdoor grills that require meat to be closer to heat just make sure you have some room to offset it, so it doesn’t burn. Put your chicken on and let it cook for at least 45 minutes. At 400°F dark meat chicken can be cooked all the way through in about an hour and 10-15 minutes or even less. White breast meat will be done even quicker.
Achieving The Perfect Internal Temperature
Check in periodically using a handheld temp probe to see what the progress is. A good safe internal temperature for chicken is 165°F. Dark meat like legs and thighs can be taken to 175° to 185°F for optimal juiciness and tenderness. When cooking breast meat be careful not to go that high as you’ll dry it out.
A good way to be sure not to overdo anything is to get yourself a good digital meat thermometer you can set up to monitor your cook for the entire duration.
Glazed Barbecue Chicken
If you enjoy glazed barbecued chicken, then do this. Once it has finished cooking brush some barbeque sauce on each piece and leave them on the grill for another 10-15 minutes at a lower temperature like 300°F. You can do this without taking them off. Or you could dip each individual piece. But, for that you would have to remove them from the grill, dip, then replace. Could be messy, but good though! Same thing, just let the BBQ sauce tack up for 10 to 15 mins. This applies to the oven method as well.


Conclusion
Using a dry rub on ribs when cooking is a delicious way to enjoy pork barbecue. It’s great for all cuts of pork. Spareribs, baby backs, butts/shoulders, belly, steaks, roasts, tenderloin, and let’s not forget chicken. With the right seasoning, techniques, and a little experimentation, you can create meats that are bursting with flavor and competition or fall-off-the-bone tender. So, fire up the smoker, preheat the oven, or get the grill going. It’s time to embark on your dry rub adventure.
Hit us up for a potential link exchange! Or just feel free to add links to any of our articles on your own blogs & websites. We encourage you to share our content all across social media.